Trans-form (week_1)
- Harshita Sood

- Mar 7, 2021
- 6 min read
Updated: Mar 23, 2021
HEY! EVERYONE.
Day-1
SYNTHETIC
So, today as being the first day of transform project , module tutors started the day with the bang of brief about the project and for the day , the things we need to do.
Therefore, to be honest this project got me a bit anxiety on how will it go but I guess once you start doing it without any fear and take risks it gets more and more interesting.
So, I made this one with the plastic bottles , I burned and melted the sides which themselves were taking the curve when brought heat closer . This one was really interesting on how different shapes of plastic changes according to the preference when we bring heat closer to the material.


In here , I took OHP sheet and heated it up a little bit so that when I put nails in there it takes up that form .


Here even I burned the OHP SHEET in a way that it has holes it between that of sheet. The level of heat use was medium.


So in here as you can see , I tried very very hard to create TEXTURE on OHP sheet by heat because it was difficult like it need very less amount of heat to create these bumps and not cut from in between but also needs enough heat these bumps are easily visible and not straight. I even failed 2 times before coming up to this.


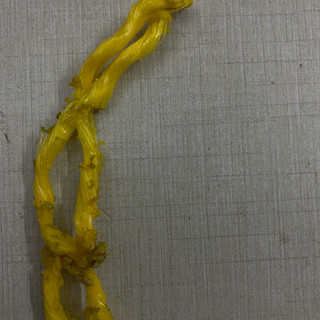
Here , the next one I took nylon rope and when I burned the rope I saw that it has started melting .


But when it burns , there's some sticky part that comes out which can be used as a to stick together all of it without the use of any adhesive glue.


When I burned the PLASTIC bottle I noticed it even have a significant level of heating and it is important to use that and if we don't do it that way it could easily go black.


Ok so again here it comes, the PLASTIC bottle. I used the lighter again to give a form you can say or a texture.


The next thing I started with was the pipe. I made several cuts on the pipe diagonally .


Then cut it in half .


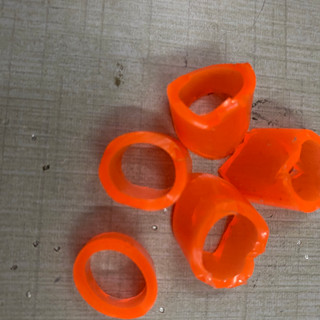
And this was most easily cut out that is straight.


Other thing I used today was foam sheet .This could be used in tons of ways even could be easily used for quilling and stuff. It is a kind of very soft material and when it is burnt it is similar to that of nylon and could be pasted by it own when heated.


Day 2
ALUMINIUM
OK, so to be honest aluminum was one of my favorite material to work with and was really fun.
I started working with a little thick aluminum sheet and banging hammer on the top of nail , it therefore helped to create this texture on sheet.


So, yeah the next technique I used was burning and actually one of the techniques I love to work with . Lets say it take very high amount of flame to actually see the effect so its better to put it directly on stove rather than doing it with candle or lighter because it won't help at all.


The same thing goes with aluminum thin sheet/ foil paper.


I tried to create some texture here with thehelp of my nail.


This texture was created by crumbling up the paper.


The next texture i formed was with again hammer and nails on a aluminium foil. Though here was a bit of a issue it got easily teared of .


The next one is with the wire and i rolled it up as much as i could and then tried burning it with candle but the paper all came out wire remained the same.


Here are some explorations with wire by twisting and making things.


Again i played with aluminium sheet i tried folding it to see how it look and after folding and banging hammer on it you can see it had gone really thin like a single series of sheet.


Here i made this texture with a pair of heavy and big scissors by hammering it on the top.


Again it’s with nails justvthe difference is that they are put up upside down and in tilted manner.


I created these texture by rolling and cutting method on aluminium sheet.
aluminum sheet were easy to use and cut.


Day 3
NATURAL
NATURAL material is all around us .
Weather it be a nutshell or jute rope or egg shells .
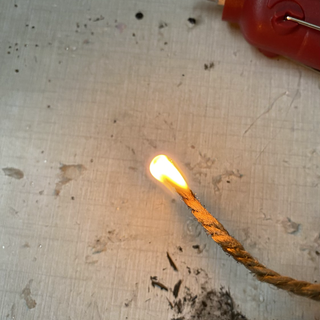
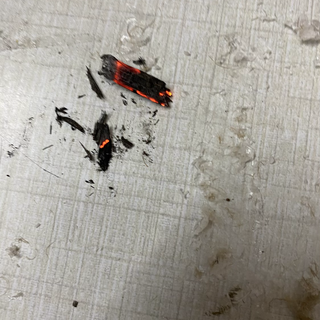
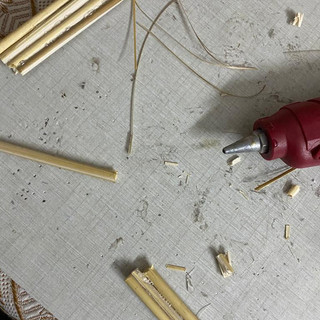
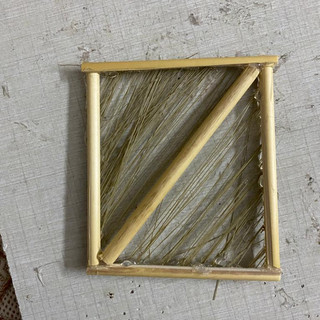
I started with SARKANDA STICKS. There are a few things i noted about the same-
- They could be used in place of candles or matchsticks easily. They are very simklar and big and even easy to use
- When they are cut in half there is a layer of foam like structure and then the peel of hard stick part.
- i tried to burn cut and stick them together in here


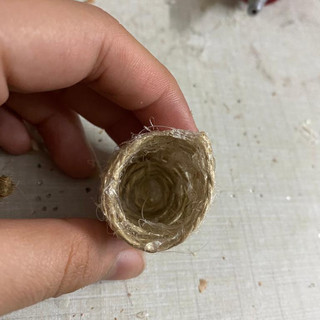
PISTA SHELLS, AKHROT SHELLS and many more are form of natural material. They could be pasted together to form different forms , texture and much more.
- I tried to burn it but it didn’t do.


JUTE ROPE-
I love the way it could be easily twisted and the different in colour when it burnt . I tried burning technique with two type of jute ropes, thin and thick.
similarity here was in the end, after burning they both come off as ashes in the end.


The next here i tried braiding the jute rope and after that it became significantly hard.
-


Similarly i did several explorations with the jute rope by creating stufff.


Day4
COMPOSITE
I was waiting for this for this the most. It was really exiting to work with resin and wax .
There are a few properties of both i would like you to be through with . That is -
- Wax when mixed with water it cools up faster and takes up the similar kind of look. Don’t use plastic container In wax as hot wax would melt it up use paper cups if you want.
you can use colors or heat up the colored candles to add colour in them
- Resin takes at least 24 hrs. to settle down .
you fan only put it in the plastic container or use OHP sheet to make a container. DONT use paper cups or things like that as a container or it would stick to it and wont cone apart.
The harder and resin should be put out as mention or it would not be fine.
ANYTHING could be used to add the colors but remember it is preferred to use water color and not nailpaints on resin to add colors because after 24 hrs it would be weird the color would be there but something would go off.
So I created this with mixture of flowers and leaves. And in the end I added color through nailpaint it may look fine but there something wrong with color when we put nailpaint. So don’t use it.


These are done with wax it was a bit destroyed but i loved this a lot.


Here i had put rubber pipes in the wax


Here i trued putting resin in fruit peel offs. but because they were paper it got stick with it and won’t come off.


I made this flower thinggy with the help of wax. And later added golden powder and did the same .


Here i added all the wax in the water and it became like this. It has both shiny golden and dull golden texture that’s because the part that was well mixed with the wax became dull and the powder that rem on the top stayed and dried up in this way.


Here, i added wax in fruit peel offs and added color to the wax .


onion peel on wax


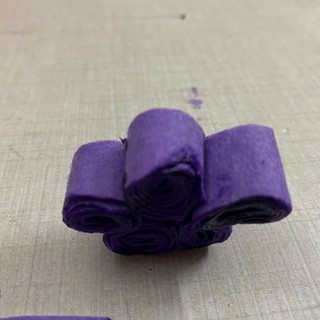
Tissue in wax with pigment of blue poster color. The tissue later became hard and had rough surface.


Sarkanda sticks in wax


Garlic peel in wax with pigment of golden powder.


Chocolate powder in wax it basically worked as a coloring agent to the wax.


wax in different colors of melted candles-blue, red and pink


Just some failed explorations.
i did it in steel so it didn’t come off easily because of which it failed. So prefer using paper cups .


REFLECTION.
This week was full of thought process, sleepless nights and engaging materials. I loved how each material changes its form through each technique. how each techniques behaves differently hen brought up together . how much a material changes with each technique applied.
For week 2 explorations follow up from the link given below// THANKYOU:)


Comments